Tuesday 30 October 2018

Bearers of bad news....

Engine bearers that is, and the bad news was the terrible weather this afternoon.

Well I had every intention of getting some serious work done on the boat today, but the weather had other plans! It has been raining for hours and there was a break in the weather so I decided to chance it and go down. The paint in the bilges was still tacky, so I decided I could at least paint the engine bearers with black hammerite. I taped off what I could and then very carefully used a roller to paint them, trying to avoid any pain dripping onto the still wet paint below. I nearly succeeded! One small drop that went through a hole in the bearer on the paint. I dabbed it off as best I could, but as the bilge will get another coat, I guess it doesn't matter. Here is a pic:


It started to rain just after I finished painting, so I had to pull the hatch across and put the washboards back as quickly as I could. Then I realised that the stuff I would need to do other jobs in the workshop was in the far end of the boat. I didn't want to risk getting water on any of the paintwork, so I left it and went home. I reckon it might take another 48 hours before it is touch dry. I am hoping to get the carpet fitted in the next few days as I have the time (and a mate to help me), so I may just have to try and put the access steps back . The access steps are a massive one piece fiberglass moulding and are very awkward to handle. I will take a pic next time I am down to show you.

Stay Tuned......

Monday 29 October 2018

Painting the bilges (again)

This is a job I recently did on Pheebs, my Halcyon 23, so it really does seem like daja vu again.

I started by rubbing the bilges down with Panel wipe, hoovered, then gave them a light sanding and hoovered them out again.

Here they are before I started painting:


I went to get some gloss paint as I couldn't get any grey bilge paint locally. I couldn't find a grey, so I went with this dark blue. I like the colour and as long as the bilge looks clean and fresh, I am happy! Here is the "after" shot:


I think I will rub down the sides and paint them too after cleaning and sanding them. They will need masking off properly as I always think clean edges makes for a more professional job. I will also do a second coat of paint too.

I started to look at the wood work from the plywood that makes up the side cupboards in the main saloon. Some of the ply is coming away, but I figured I will have a go at gluing them first and see if they are salvageable. Its not the cost of cutting new ones, but rather the way they have been cut and fits the bulkheads that they go between them.

More to follow in the next couple of days.


Sunday 28 October 2018

Can't get you out of my (Bulk)head

Another bad pun. Never mind!

On Saturday, I went down to the boat with Neil and we managed to stick down the 2 bulkhead linings that I had cut out the week before. Of course, noting on a boat is simple and we ended up discovering the edges of the bulkheads are not perfectly straight! So we used the bottom edges as a true edge and the results aren't too bad. Here is a pic:


When we got them stuck down with grab adhesive, some parts kept pulling away (presumably due to the curve that was put in the sheet from being rolled up when sent up to me. So we had to use pieces of wood and some clamps to keep the liner pressed to the bulkhead. You can see some of them in this pic:


As you can see, the top of liner is not a perfect fit, but this will be covered by the roof panels and trim. I haven't decided what to use for the trim, so any suggestions welcome.

When we had finished this I have a visit from Mick and Peter (who both used to own Solas). They are going to help install the engine in the next few weeks. Its a Yanmar 12 (replacing the Yanmar 8 which was removed (stolen) from Solas when she was stored in another boatyard), so I'm hoping it isn't so heavy it affects the trim of the boat. We will have to see. Any opinions?

Mick has said, although the engine bay is now very clean (I spent a whole weekend cleaning and removing buckets of grime and oil), it could do with being painted. As I am grateful for their help, I will get this done as soon as possible so they can get on with the installation when they want to, rather than having to wait for me.

After I have painted the bilge, Neil and I will start to line the cabin sides around the windows with the van carpet. Hopefully, I will have this done later this week.

Bye for now!


Sunday 21 October 2018

Panel beating on the portside

More cutting than beating really.

I cut the 2nd panel today. Made a pretty good job of it (I thought!). Here it is:


Anyway, it fit almost perfectly, but there was a little high spot at the side where the bulkhead is fibreglassed to the side of the boat. Rather than try and grind down the high spot (which creates dust and may also remove a bit of strength, I decided to trim the panel a bit. Of course I went too far and the section that lines the window now has a big chip out of it!. Fortunately, as I plan to cover the panels in contact type sticky plastic film, I should be able to fix it. Also, there will be the wooden or plastic framing around all the edges, so that should mask any mistakes. I didn't take a picture of it as I was rather annoyed at myself.

However, before all of that I had to remove some screws that were still embedded in the bulkheads and file down screws that had snapped when I tried to remove them (and had jagged edges sticking out). I used a metal file and it took about an hour or so as I could only use an inch or so of the file.

To remove the screws, I borrowed some mole grips. However, even screwed down, I could not get enough purchase on the siezed screws. With necessity being the mother of invention, I came up with this:


It is a fork and spoon nestled together, on one side of the mole grips. On the other side I had a knife. Using the cutlery, I was able to get a really good grip on the screws and eventually ease them out.

I will probably have to wait until next weekend to fix them to the bulkheads. One question I do have is what to use to glue them to the bulkheads? I am thinking a thin layer of some sort of grab adhesive, as there is no structural element to these. Any suggestions appreciated!

I had spent about half an hour scraping the sides with the windows that will be carpeted, to remove all the excess glue still left. This created a load of muck, so I then spent some time cleaning and hoovering the whole boat (yet again!).

One job that has needed doing for a few weeks now is cleaning the bilge.There was some raw epoxy that had spilled into the bilge a while back and although I had removed the bulk of it, I needed to clean it properly with acetone. This involved using (and sacrificing) a load of sponges and clean cloths. Never mind, at least the bilge is not sticky to the touch anymore. I wore industrial rubber gloves when doing this job as I find you can never get you hands clean using soap and water and I believe rinsing with acetone in not really a good thing.

More to follow....

Saturday 20 October 2018

3 sheets to the wind

Plastic sheets that is. And there is 4 of them in total to do.

Today I went and started to cut and shape the plastic sheet that will be glued to the 2 main bulkheads. As usual with most jobs on a boat it took way longer than I thought. Admittedly, the fact that the workbench and jigsaw are about 60 yards from the boat and I have to carry the sheet across to cut it and then go back to the boat, climb a ladder and offer the sheet back up. Now and again the wind would catch it as I was climbing down the ladder, which almost threw me off balance a couple of times. It took me about 2 hours to cut this shape out:


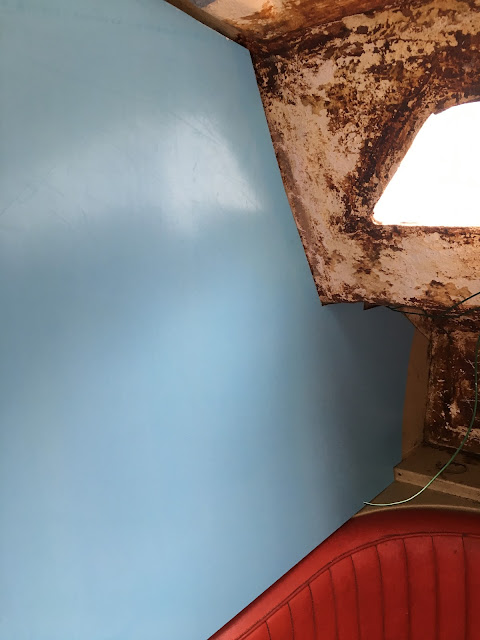
You can see the shape and although it doesn't look that complex, I had to make constant measurements and cuts to get it to fit properly. What made the job harder is the sheet is a rather thin 1.5mm thick. I wanted it thin so it could bend over the irregular surfaces such as the fiberglass tabbing around the edges of the bulkhead, but because it flexes so easily, I couldn't hold it flush against all of the bulkhead at once. Anyway here is a shot of the first panel against the bulkhead, ready to glue in place:


In case you hadn't realised, the blue surface is just a protective film I will peel off when I have glued it to the bulkhead. I have some screws to file flush before I can do that.

Later, when I went to fit the second panel, I discovered there are still a couple of screws still in the bulkhead and I didn't have any molegrips to hand, so that will have to wait until tomorrow. Talk about a drawn out job!

More tomorrow.....

Tuesday 16 October 2018

Is there anything better than a package arriving?

Actually Yes there is. 2 packages arriving within 20 minute of each other!

Today the van lining and the plastic sheeting arrived. Here is a pic.


Due to my lack of photography skills, you cannot really see the plastic sheet, but it is rolled up in  front of the carpet liner.

To show you where I will be using this you will need to see these pics.

Before:
As you can see in the next pic, I have removed the backing carpet and wooden slats that lined both of the bulkheads. It was horrible and dirty and took a good few hours to remove as all the slats were screwed down and some of the screws were impossible to remove, and were left in the bulkhead, so I had to then try and use molegrips to remove them. Half of them snapped off leaving a bit of protruding screw which will need to be filed down until near flush. Lastly, the carpet was also glued down with something that would not release it, and I had ended up having to use a crowbar to lever it off a bit at a time. Here is the after pic:


So, the white cladding will line the bulkheads and the carpet will do the sides around the windows and the area below, which once I had removed the ply front (which makes up the cupboards) and after a few more hours scraping the rotten foam off, now looks like this:


Looks pretty grim doesn't it? This will be the area covered by carpet. The small wooden bulkheads are held in by pressure and some wooden guides that are on the back of the cupboard panel.

So hopefully, this will revamp the interior somewhat. Incidentally, I intend to then cover the bullkheads in sticky back plastic lining, which is available in all sorts of finishes and textures.

I got the idea from a guy called Andy who has also restored a Tomahawk 25. He has a YouTube channel and a Facebook page, which are below;

FaceBook: SV Harley Quinn

YouTube: SV Harley Quinn

These really are worth checking out as it shows you what can be done with a bit of effort. His Tomahawk 25 is lovely. Give the guy a thumbs up and subscribe if you can!

More to follow......


Monday 15 October 2018

Hello and Welcome!

To my new blog.

I recently purchased a Marcon Tomahawk 25 which I hope to renovate over the newt few months.

Here is "Solas" in all her glory.


I first saw Solas last year when she was purchased by a member of the boat club I am a member of. It was the same member I had bought Pheebs from in November 2013!

He had her for a few months and then sold her to another member, who purchased a Yanmar 12hp engine for her. I was offered her a few months later (April 2018), but decided to stick with "Pheebs" (my Halcyon 23). Solas was then sold her back to her previous owner. He decided to sell her again as he needed a new car for work, and I was kindly given first refusal. So I decided it was the right time to buy her.

Here is a pic of her rather dated interior:


This will all be updated in time, so stay tuned.